Guide: CookieTractor with Optimizely/EPiServer CMS
This guide walks you through, step by step, how to implement CookieTractor on your Optimizely website.
This guide complements Getting Started with Optimizely/EPiServer CMS & CookieTractor.
1) Create an Account and add your Website
Start by creating an account on our homepage. Once your account is created, log in to the tool and add your website. All new websites automatically receive a free 30-day trial period. After the trial ends, the account will be converted to a paid plan, provided that you have added your payment details.
2) Install CookieTractor on the website
In the tool, under the specific website, you'll find the Installation tab. There you'll find the JavaScript that needs to be integrated into your code.
We recommend placing our <script> as early as possible in the <head>, ideally before any other logic. The simplest approach is to include it in a shared layout view that is used by all page templates on your website.
A typical setup might look something like this:
<!DOCTYPE html>
<html lang="en">
<head>
    <title>CookieTractor | The user-friendly cookie banner</title>
    <script src="https://cdn.cookietractor.com/cookietractor.js" data-lang="en-US" data-id="41584181-2800-43cf-884a-30e7ec0f91e3"></script>
    [...]
</head>
<body>
    @RenderBody()
</body>
</html>
3) Verify the Installation
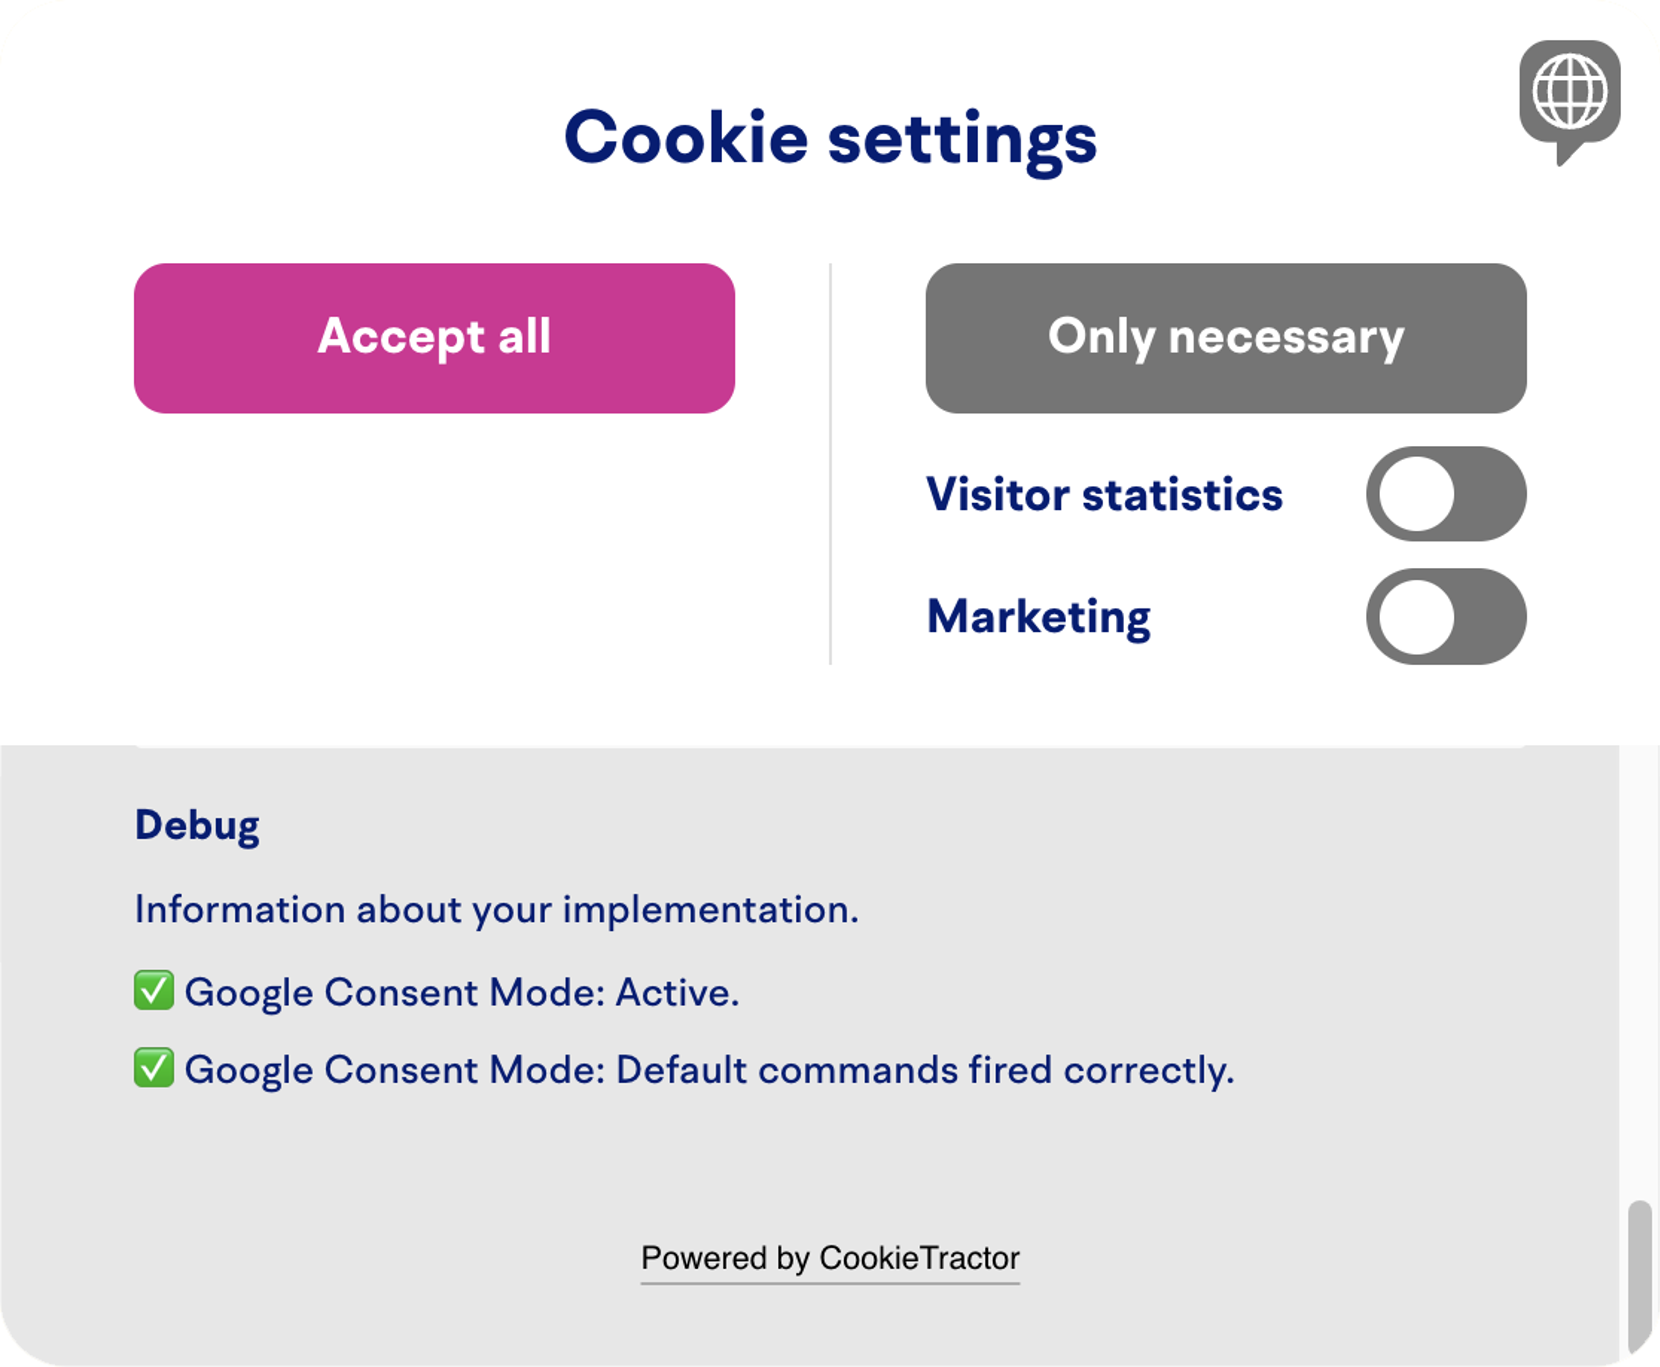
Visit the website and make sure that CookieTractor is displayed as expected.
You can also add the query string parameter ct-debug=true to the URL to enable debug mode and reopen the cookie banner. This helps verify that the script has been loaded correctly.
Example URL: https://www.cookietractor.se?ct-debug=true
4) Install the CookieTractor Dashboard
Download and install our package from the Optimizely App Directory.
There are two ways to do this:
- Via NuGet Package Manager: CookieTractor.Optimizely
- Via the terminal: dotnet add package CookieTractor.Optimizely
Which method you choose depends entirely on your preferences and what your infrastructure allows.
5) Registrer services
In your Optimizely project, add CookieTractor in your startup-configuration:
using using CookieTractor.Optimizely;

services.AddCookieTractor();
Also add it as a Middleware:
using using CookieTractor.Optimizely;

app.UseEndpoints(endpoints =>
{
    endpoints.MapCookieTractorRoutes();
    endpoints.MapContent();
});
6) Create an API Key
Go to your website in our tool and scroll down to the bottom of the Installation tab. There, you can create an API key.
Once the key is created, add it to your appSettings.json file in your Optimizely project, like this:
{
    "CookieTractor": {
        "ApiKey": "key-as-guid-string"
    }
}
7) All Done!
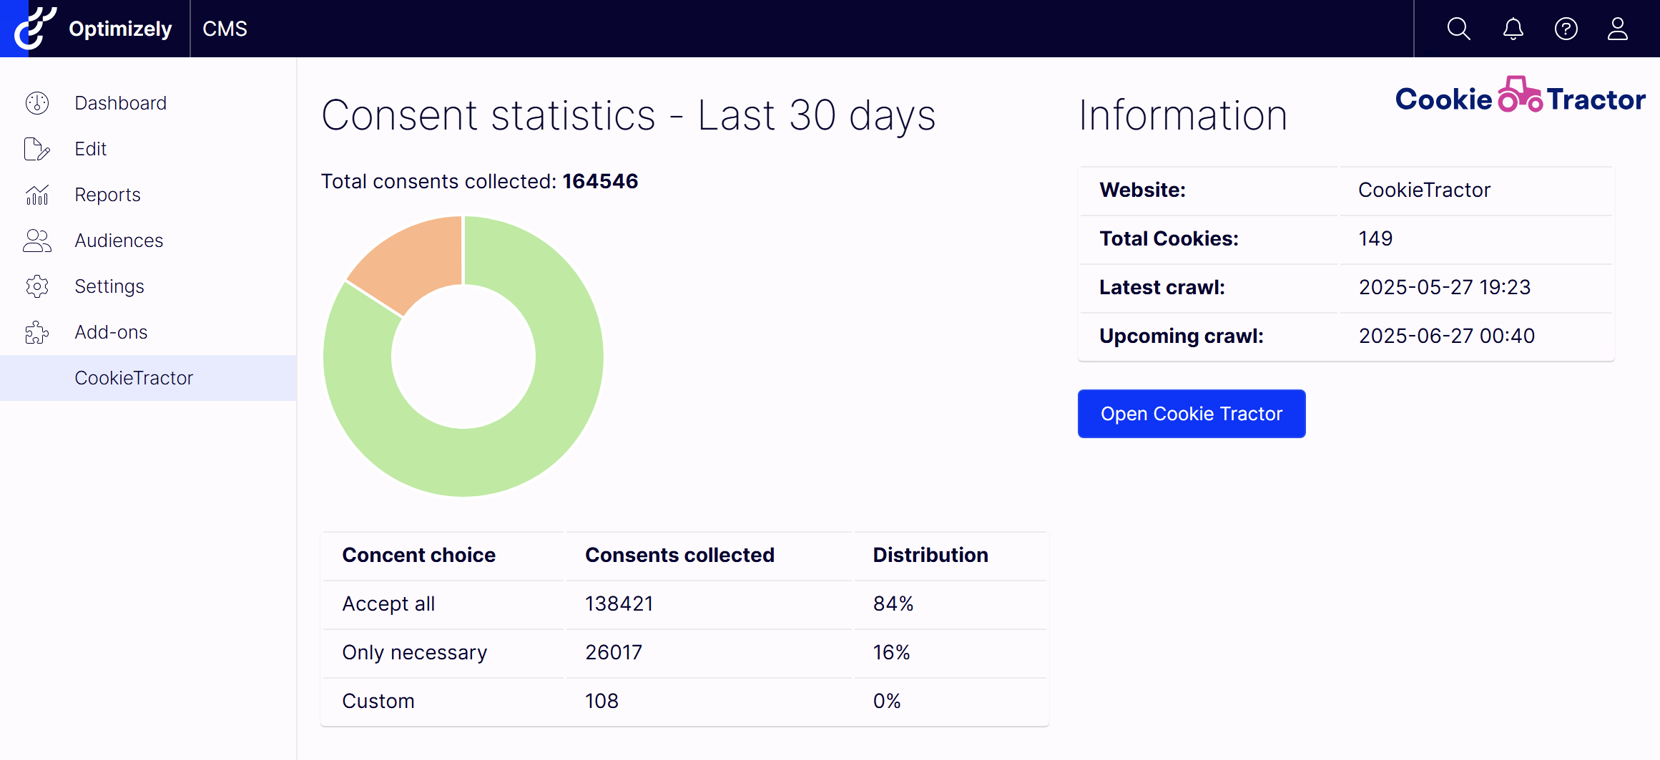
Inside Optimizely, you’ll find our dashboard in the left-hand menu under Add-ons. Look for CookieTractor.
Related information
Support
If you have questions about the installation? Feel free to contact us at info@cookietractor.com